Farmhouse Kitchen // the Lighting Plan
THE FARMHOUSE
*post updated 2/1/2020 with photos of the completed kitchen
If we’ve discovered one truth from renovating nine (!) kitchens, it’s that you can never have too much light. So for our Farmhouse kitchen remodel, we put it all in. Pendants, recessed cans, sconces, natural light, and appliances with built-in lighting.
Today I wanted to share how all that lighting goes together. We’ll be talking about what fixtures we have and where, the switching plan, the light bulbs we like, a reflected ceiling plan, and the lighting lessons we’ve learned along the way.

psst: all kitchen lighting sources are below, other sources can be found here
the lighting plan
I think lighting is easiest to understand in plan view, so Garrett put together a drawing. Back in my project manager days, we called this a reflected ceiling plan, and we’ve added in the switch locations.
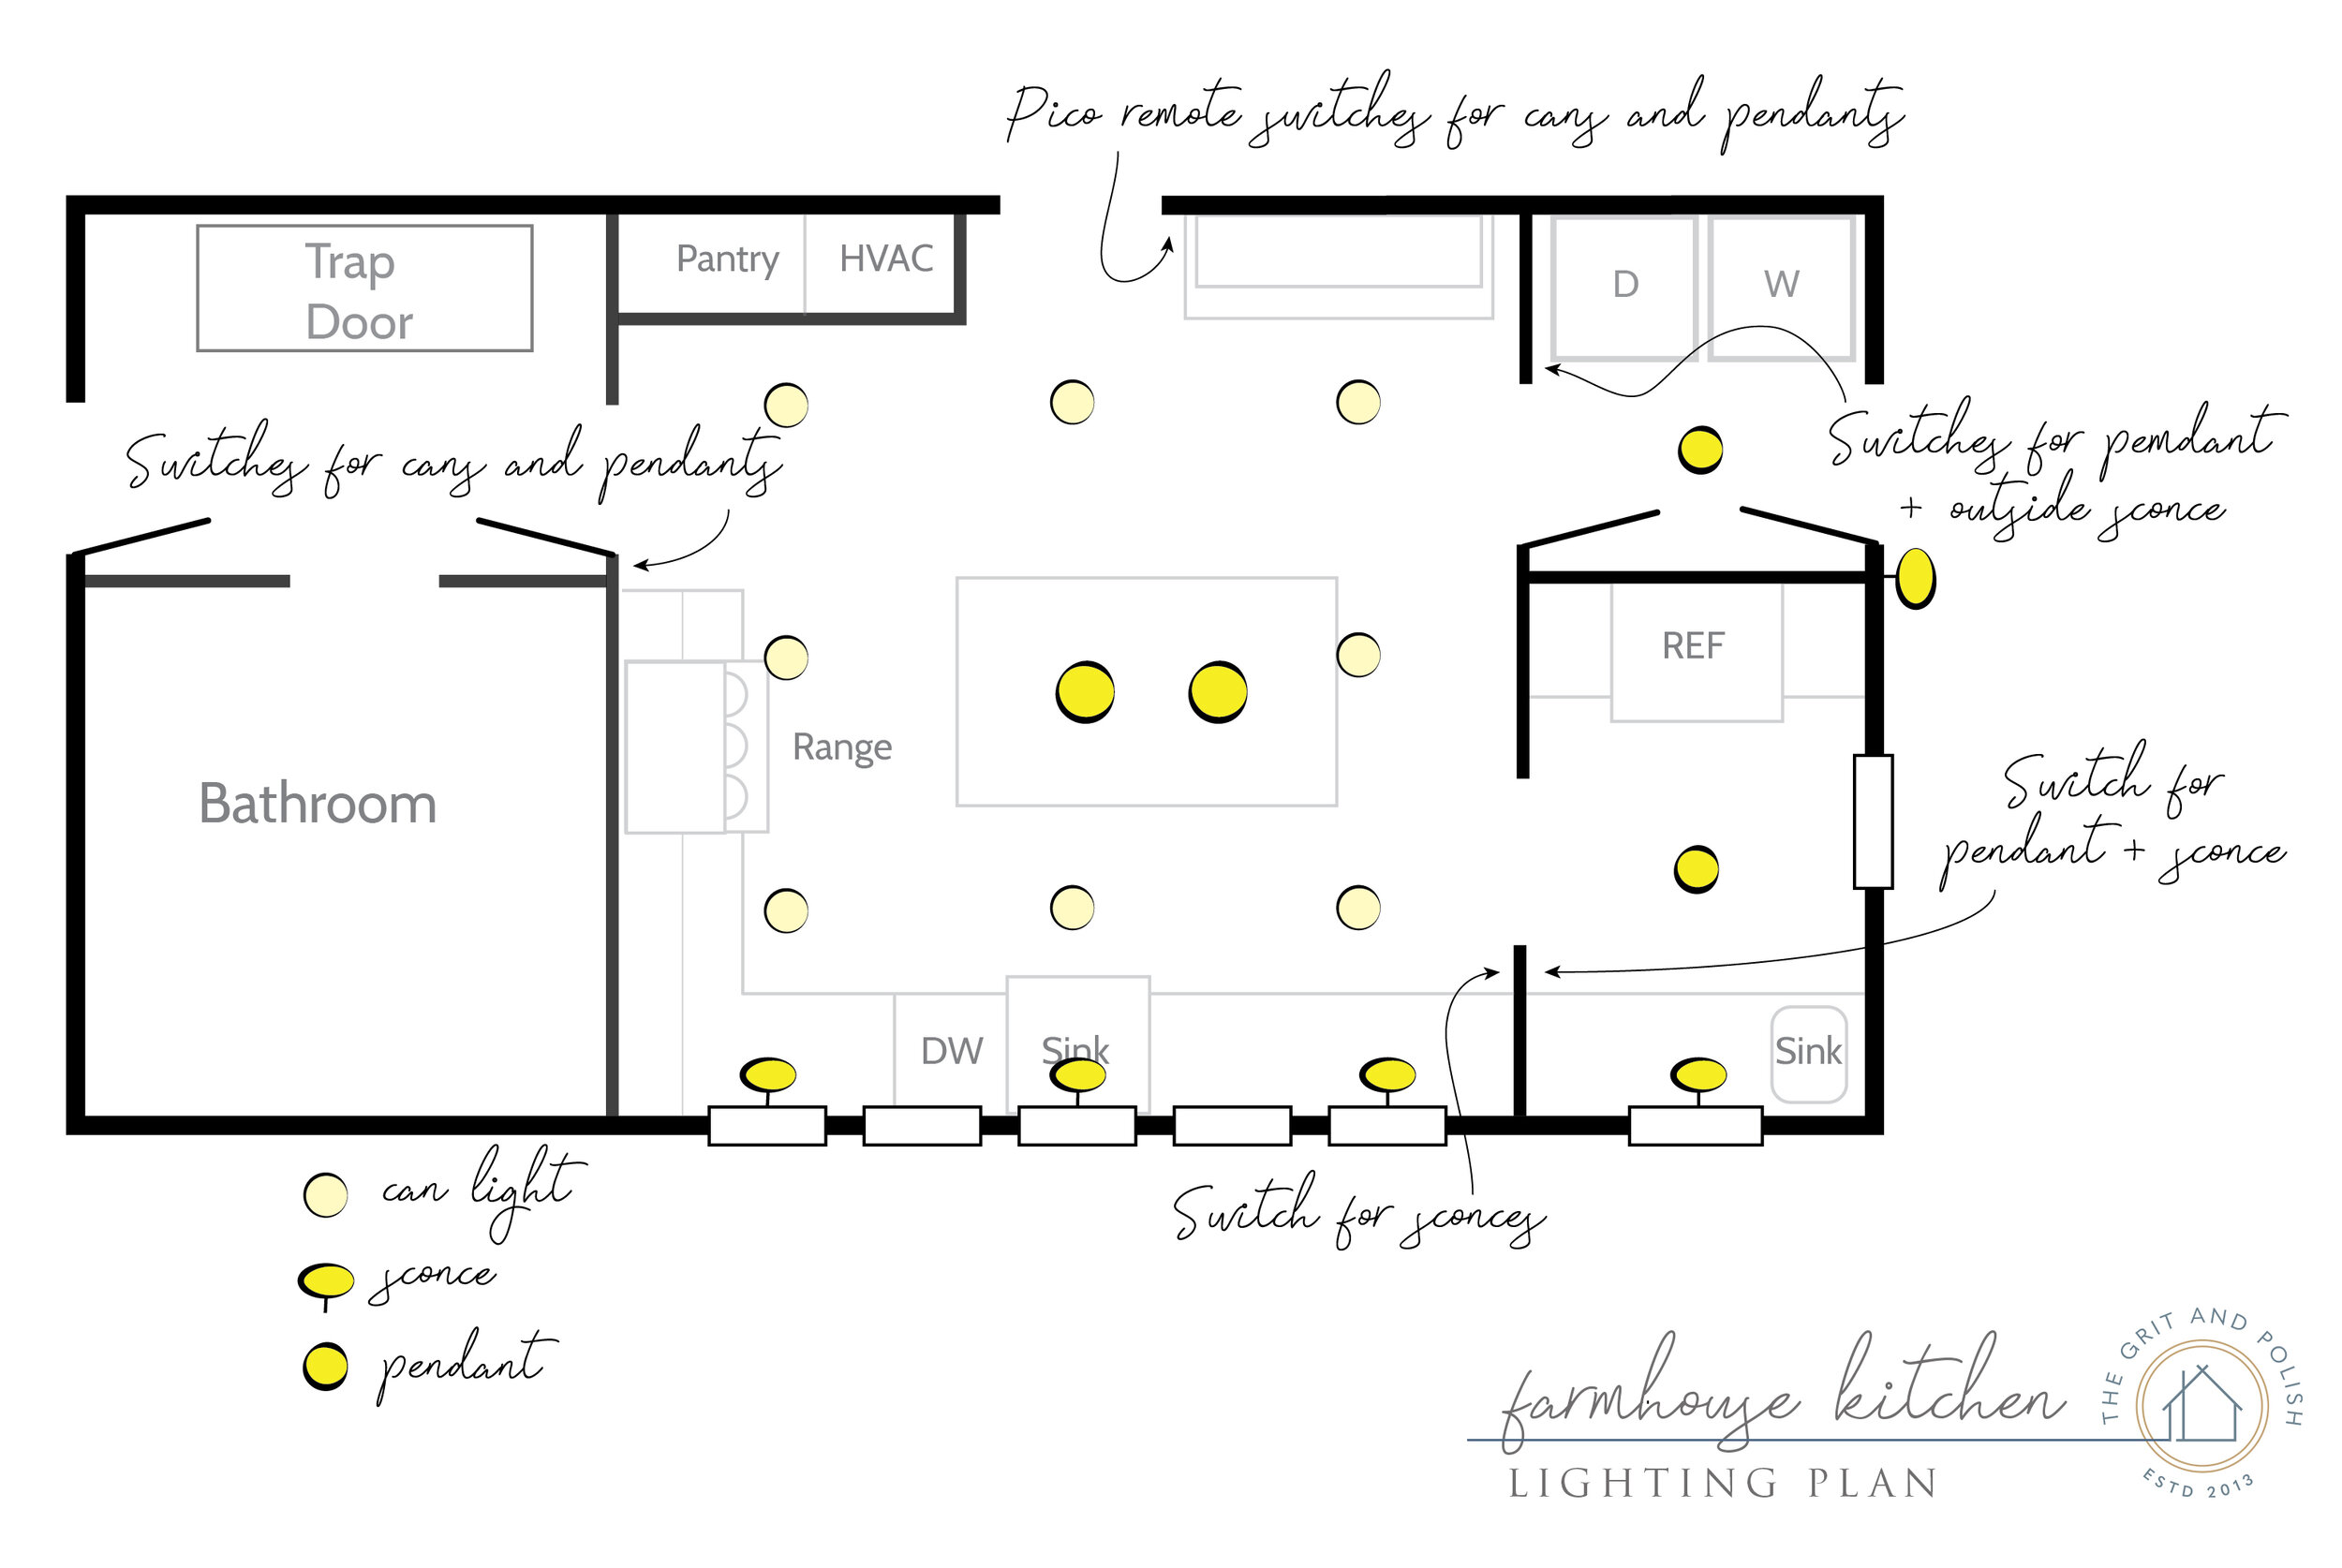
That looks like a lot of lighting, but really it’s just about perfect. Time will tell of course, but so far we haven’t found any dark corners or wished for any additional cans. At any time of the day and in any given season we can layer enough light to make this space pleasant to be in.
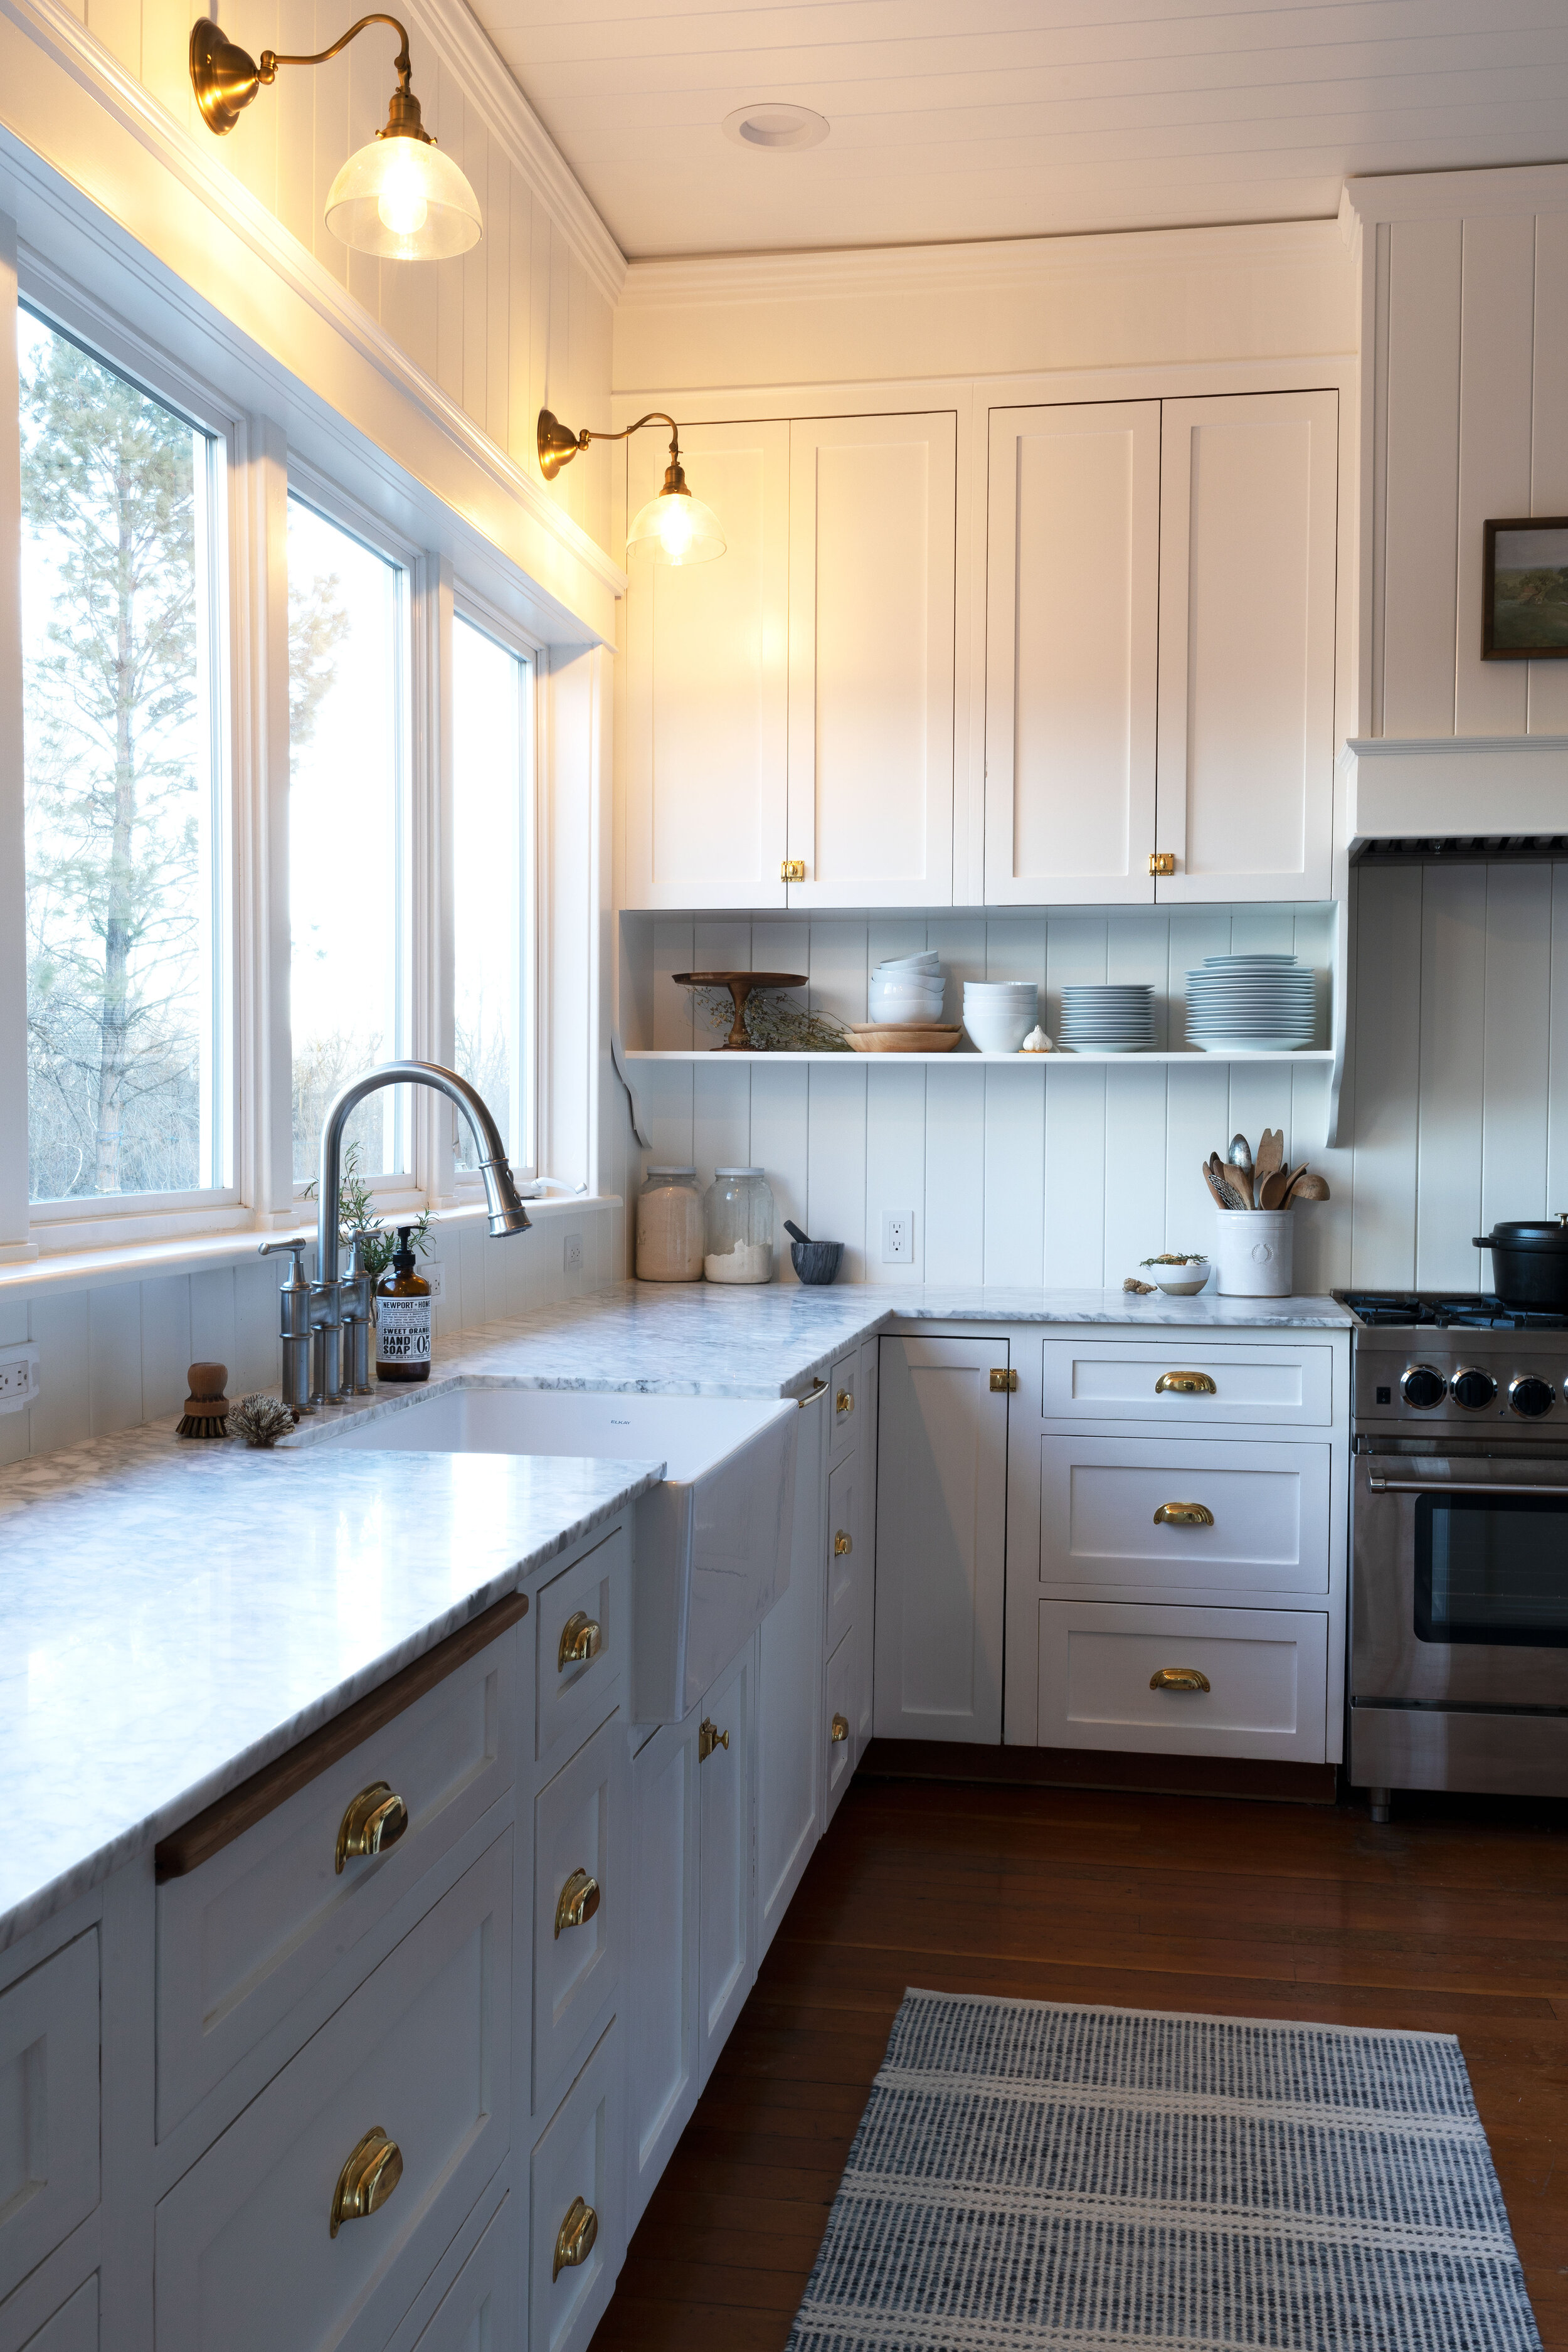
Here’s what that lighting plan looks like in real life.

A well-lit kitchen will have 4 or 5 different sources of light (or maybe even more). Our’s has 5. And I wanted to walk through each type of lighting we used and then share a roundup of the actual products we have in this kitchen…down to the plate covers.
Lighting types
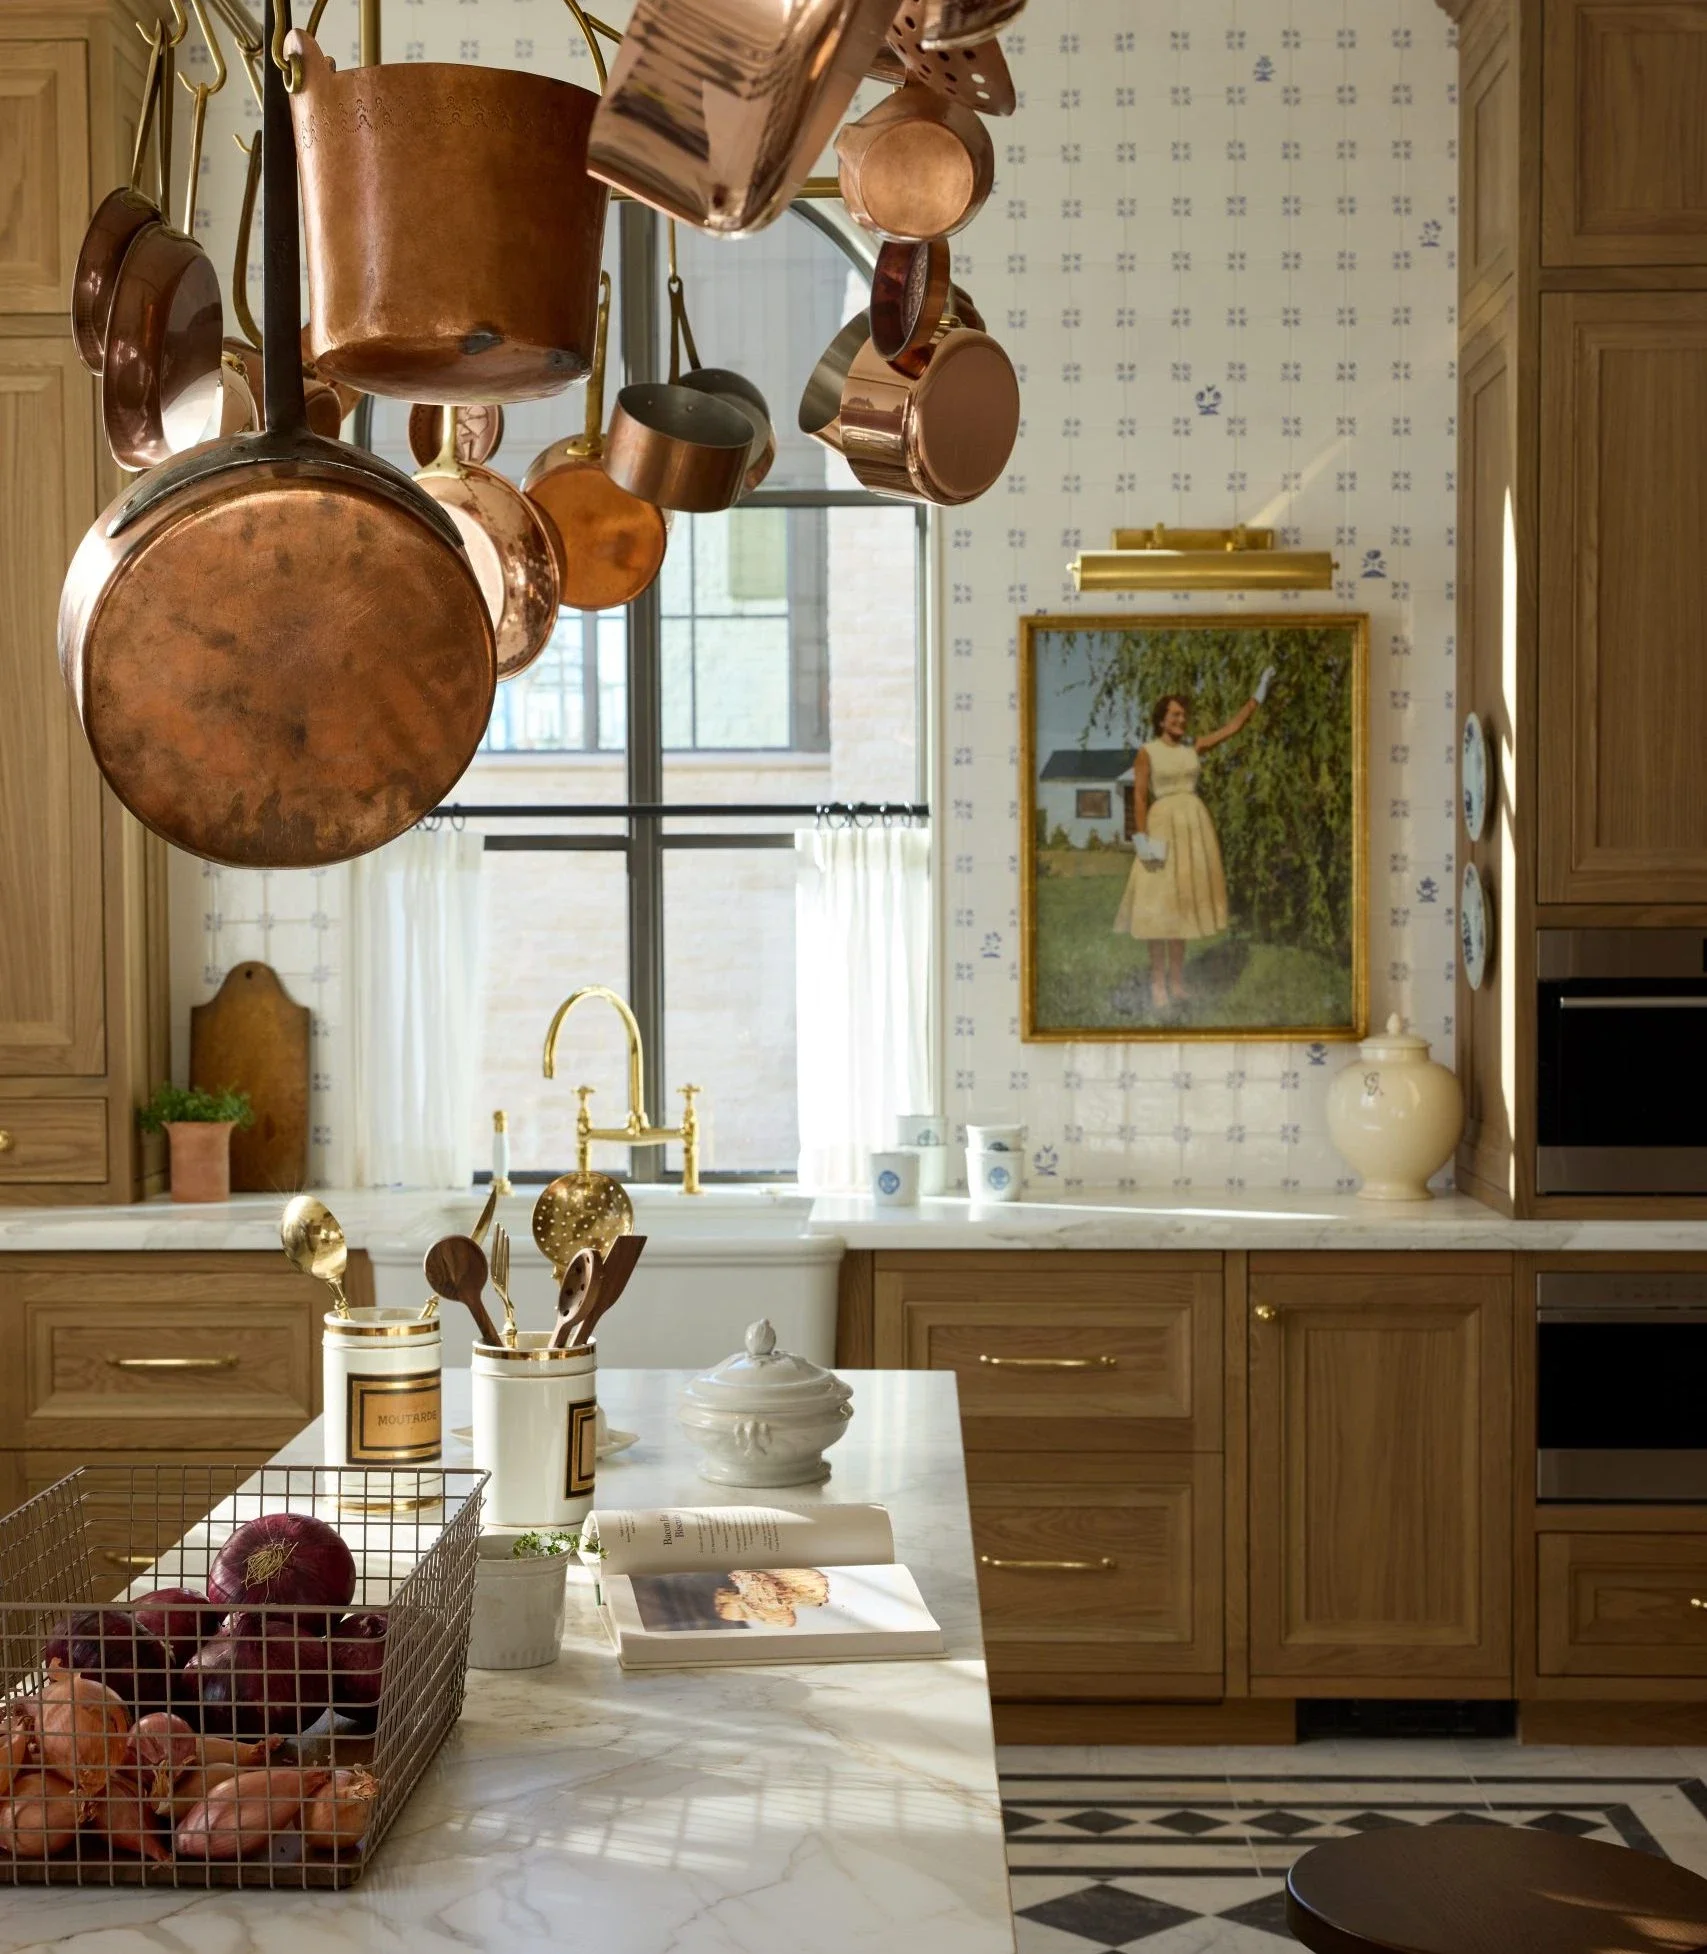
Pendants
Pendants are the fixtures you notice most but they’re not necessarily the main source of light. We opted for 2 large pendants with 40” drops. I like that they take up some of the vertical space in our kitchen (we have 10’ ceilings) without obstructing the windows.
Our pendants are 46” above the countertop and which is higher than most designers recommend these days, but it feels right with the windows and gives off an ‘old house’ vibe (did pendants used to be higher like this?). Studio McGee has a handy guide for hanging pendants if you’re curious about the dimensions designers recommend. They are spaced 28” apart which is just slightly wider than true 3rds on the butcher block.
Sconces
We added 3 sconces over the bank of 5 windows over our long countertop run. These provide great work light over the countertops. They’re also our go-to late at night when we don’t want a lot of light. We put these on a dimmable motion sensor switch so if anyone has to come through in the middle of the night, a soft light turns on without having to fumble for a light switch.
Recessed cans
Truth be told, I’m not a huge fan of can lighting, especially in older homes. But they’re so darn useful. We have 8 of them in here (7 were existing, the 8th we used a retrofit housing to install) and they provide the majority of the light. In general, we like to have can lighting in work spaces - like kitchens, bathrooms, mudrooms, laundry rooms, etc. The key to keeping recessed cans looking good, in my opinion, is making sure they’re installed on a grid or some other rationale layout.
natural light
Natural light is the best kind of lighting! And I’ll definitely opt for that first. But when the days are short and the skies are cloudy, we keep artificial light feeling more natural with warmer bulbs (like 2700 or 3000 kelvins). I think I’m extra sensitive to lighting because I get migraine auras. Really cold bulbs and florescent lights are my kryptonite.
appliances
One of my favorite things about having a hood vent is the light it adds. Our hood vent has 2 level of lights and I love using them in the mornings and evenings when cooking (in the winter at least). It’s basically the really-focused task light.
Products we used
Lighting can be confusing so I gathered up all the products we used and organized them by lighting type.

sources: 1 pendant / 2 LED bulb / 3 smart switch + pico remote / 4 plate covers / 5 sconce / 6 LED Edison bulb / 7 dimmable motion sensor switch / 8 plate cover / 9 retrofit can light trim / 10 retrofit can light housing / 11 smart switch + Pico remote / 12 switch covers
Lighting tips
Okay, so we aren’t designers. And we’re definitely not lighting designers. But we’ve learned a lot from trial and error over the 10+ years we’ve been renovating. Here are some tips we wish someone would have told us about kitchen lighting when we were starting out.


Add more than you think you’ll need
A couple of our early kitchen remodels ended up without adequate light. So we’ve learned to always add more lighting than we think we need. It’s always better to have a light that you don’t use often than to need a light that’s not there.
bulbs matter
It took us awhile to figure out that bulbs really affect lighting and how a room feels. And it all comes down to kelvins. The higher the kelvin rating, the whiter the light. I like warm lights so we usually get bulbs with 2700 or 3000 kelvins. Those give off a welcoming and comfortable light that, in my opinion, feels more natural than bulbs with higher kelvins. But if you like your lighting a little colder, opt for higher numbers. And if you’re not sure, try a few different bulbs out, see what kelvins you like, and then stick with it.
Smart Switches
We started using smart switches at our Farmhouse last year and were blown away by how useful they are. So for this kitchen we bought 2 Caséta by Lutron switches for the pendants and cans (btw Lutron has been a sponsor of our’s but we bought these with our own money because we love them).
We’re able to use our phones to turn the pendants and cans on and off, set them on a schedule (because who wants to walk into a dark kitchen at 6am in the winter?), and set them to ‘away’ so they turn on and off randomly to mimic us being home. Plus we mounted a Pico remote for the cans and pendants to create 3-way switches without actually wiring for a 3-way (see next tip). We put the sconces on a dimmable motion detection switch which means anyone coming into the kitchen at night doesn’t have to fumble for a switch.

battery operated switches work great in hard-to-wire places
Our Caséta switches came with Pico remotes so we mounted them to the wall to function as 3-way switches. In areas that are hard to wire (like next to our kitchen doorway) or in old houses where you don’t want to deal with fishing wire, knob and tube, or patching plaster, this is a GREAT option! The remotes mount into plates so they just look like smart switches on the wall.

finishes
I like to stick with one metal finish (and maybe possibly 2 if there’s a reason for it) for all the lighting in a room. For our Farmhouse we went with Rejuvenation’s ‘old brass’ finish. We used both clear glass and opaque glass globes, but the coordinating metal finish helps the space feel cohesive. We also brought same metal finish into the adjacent laundry room and pantry to help unify the spaces.
Spend some Time on your switching plan
Planning out which lights go on which switches and where those switches are placed is an important part of every kitchen remodel. For our Farmhouse, we have the cans, pendants, and sconces all on different switches. The former two are switched by the doors but the sconces are switched by the windows and that was done with a lot of thought on how we’d use the lights.
That’s everything we know about lighting for this kitchen. And that about wraps up the last of our projects before calling this remodel done! Stay tuned for a reveal post very, very soon!