
Our DIY Patterned Penny Tile Floor at the Poplar Cottage
THE POPLAR COTTAGE
After years of ogling patterned penny tile floors, we finally DIYed one ourselves at the Poplar Cottage! We opted for a classic and not-too-contrasted white and silver design that feels perfectly at home in this cutie of a house. I love how these floors are such an inexpensive and easy way to elevate a space (the hardest part is deciding on a pattern!). Have a look…

sandals | shorts (similar) | White penny round tiles | Silver penny round tiles | Marble 12x12 tile

The tiles are all from the Home Depot (we were lucky enough to work with Daltile on this project, so the tiles were gifted but this post isn’t sponsored). I’ll share more photos when we finish up the walls, but I just couldn’t wait to share these floors!
Regarding the design…
I had look at lots of inspiration images of penny tile patterns and had a general idea of what I wanted, but I didn’t nail down the final pattern until we started tiling. Honestly I wish I was the kind of person to have everything designed before getting so far into a project, but I’ve come to realize that’s just part of our process. Design-as-you-go works for us.
We started this tile project in the shower since it’s furthest from the door and we didn’t want to be walking on the tiles after we laid them. For the shower pattern, we opted for a thin silver border and 3 stars centered in the bay.
The shower floor is sloped towards the drain (yes, the off-centered drain, which is apparently due to the framing below and something I decided not to push back on for the good of our marriage ;) making tiling a little extra tricky. But the install was fairly easy and we cut out for the stars at the same time we laid the white penny tile mats down. There was a little fudging and a little nudging but it turned out great.

Once we had the shower floors finished, I got busy laying out options for the main bathroom floor. I knew we’d do another thin silver border, but the star spacing was a big question. Here are the four patterns we considered…
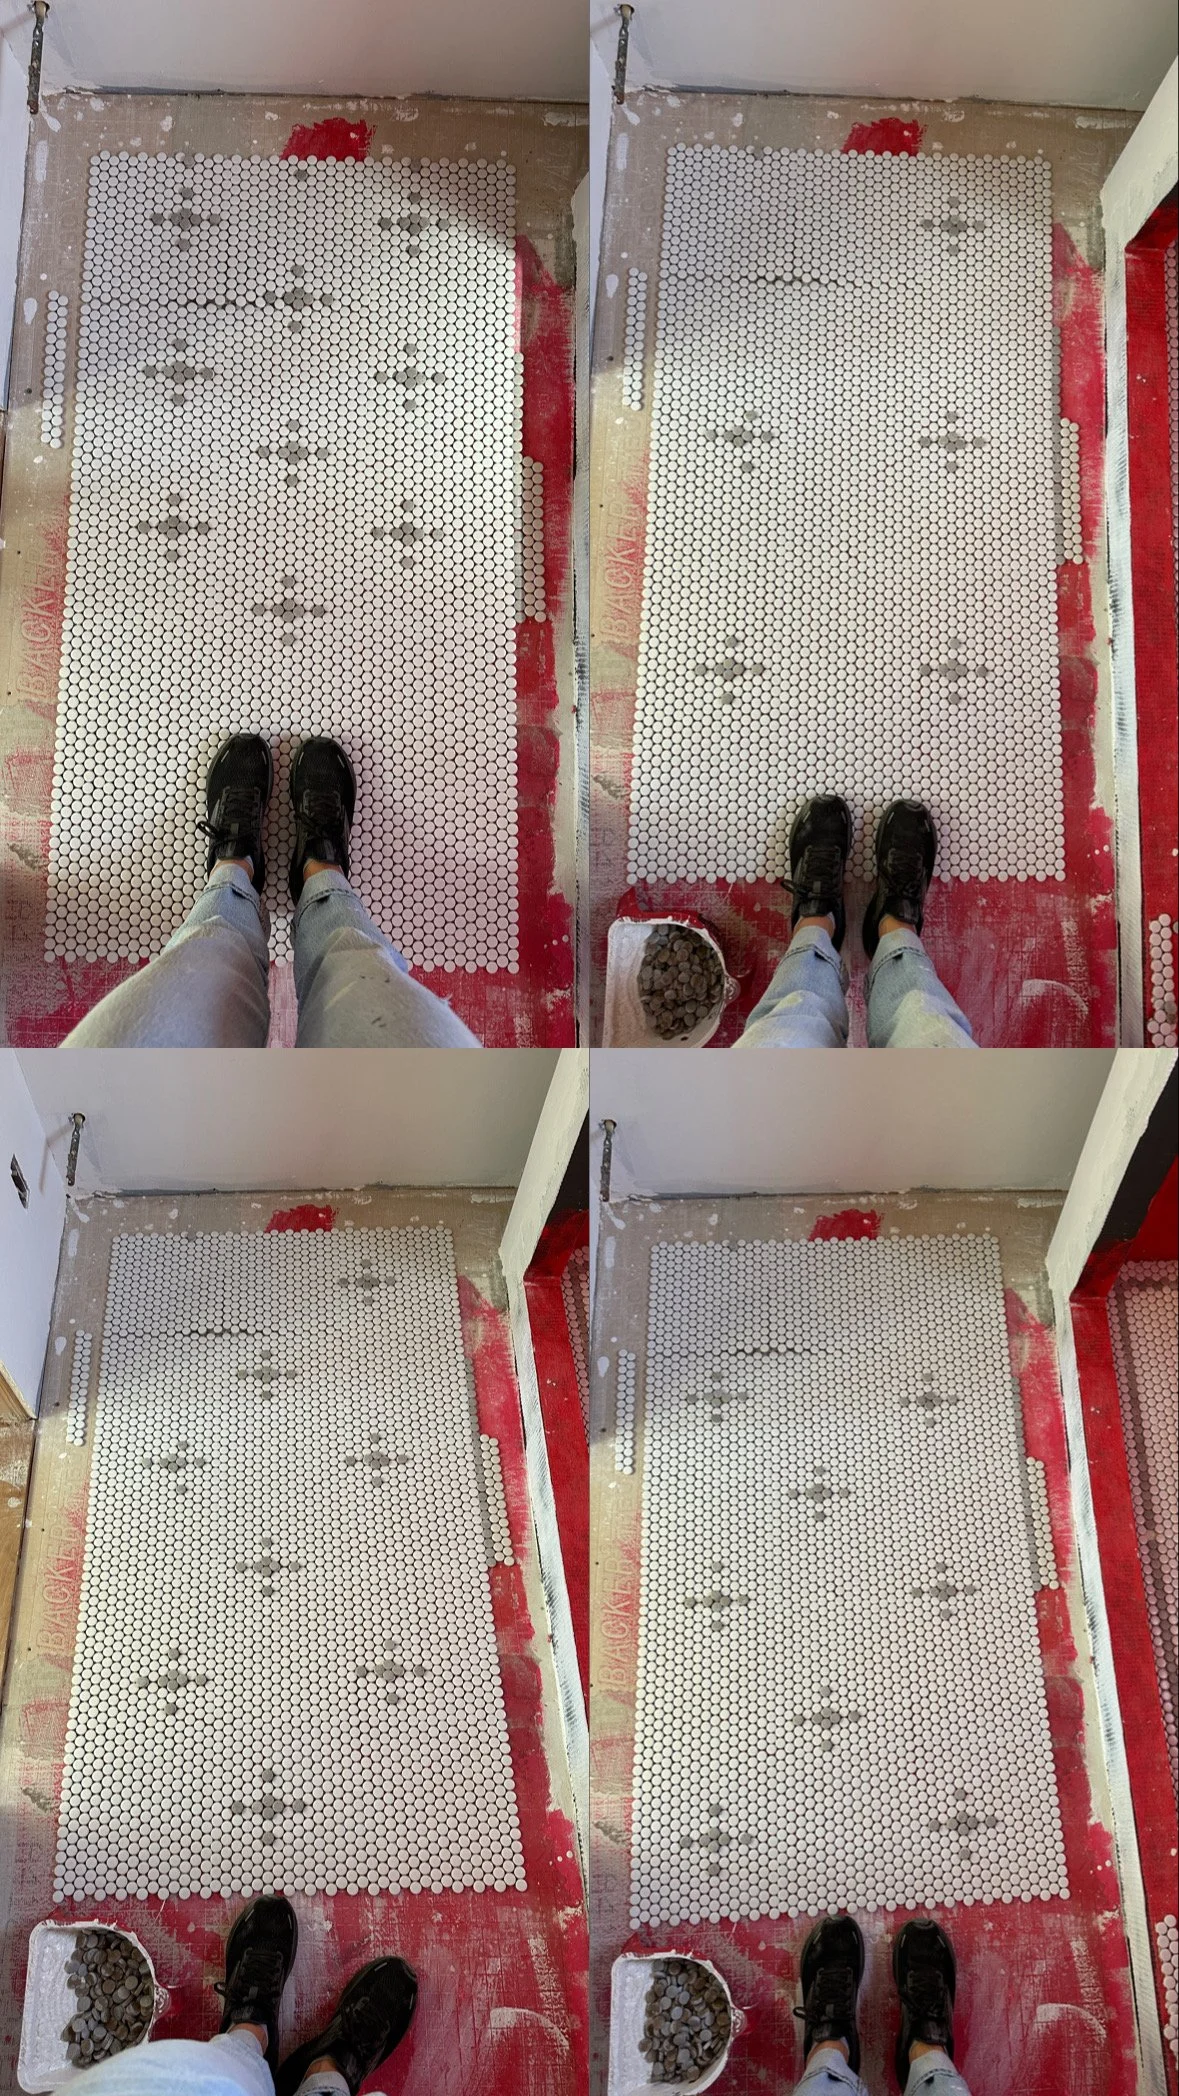
As I mentioned earlier, designing the pattern was the hardest part of this whole tile install. We sat with the decision for a bit and then decided to do option 4 (bottom right), lining the stars up with those in the shower and then adding an extra row in-between.
With the design nailed down, we started in on tiling. For this part of the floor, we decided to lay the silver border and all the white tiles and then come back to cut out for the stars afterwards (before the mortar had too long to set). These penny tiles come on a glued mat backing so we had to use a knife to cut them out (a mesh mat would make this step easier since you could just pop the tiles up off the backing) and then used a small amount of mortar to glue the silver tiles in place.


We decided to go with a warm white grout and picked Fusion Pro (in bright white) since it was available at Home Depot and was a one-component that didn’t need mixing. I would usually opt for a gray grout (white is harder to keep clean and can look dinghy) but I hate seeing the seams between penny tile mats and white grout can help hide those. But after seeing how well these tiles laid (I can’t see any of the seams!), I definitely think we could have gotten away with a gray grout, but oh well. The white looks great.


Next up…the walls (and ceiling!).


