All the Details on Poplar's New Staircase
THE POPLAR COTTAGE
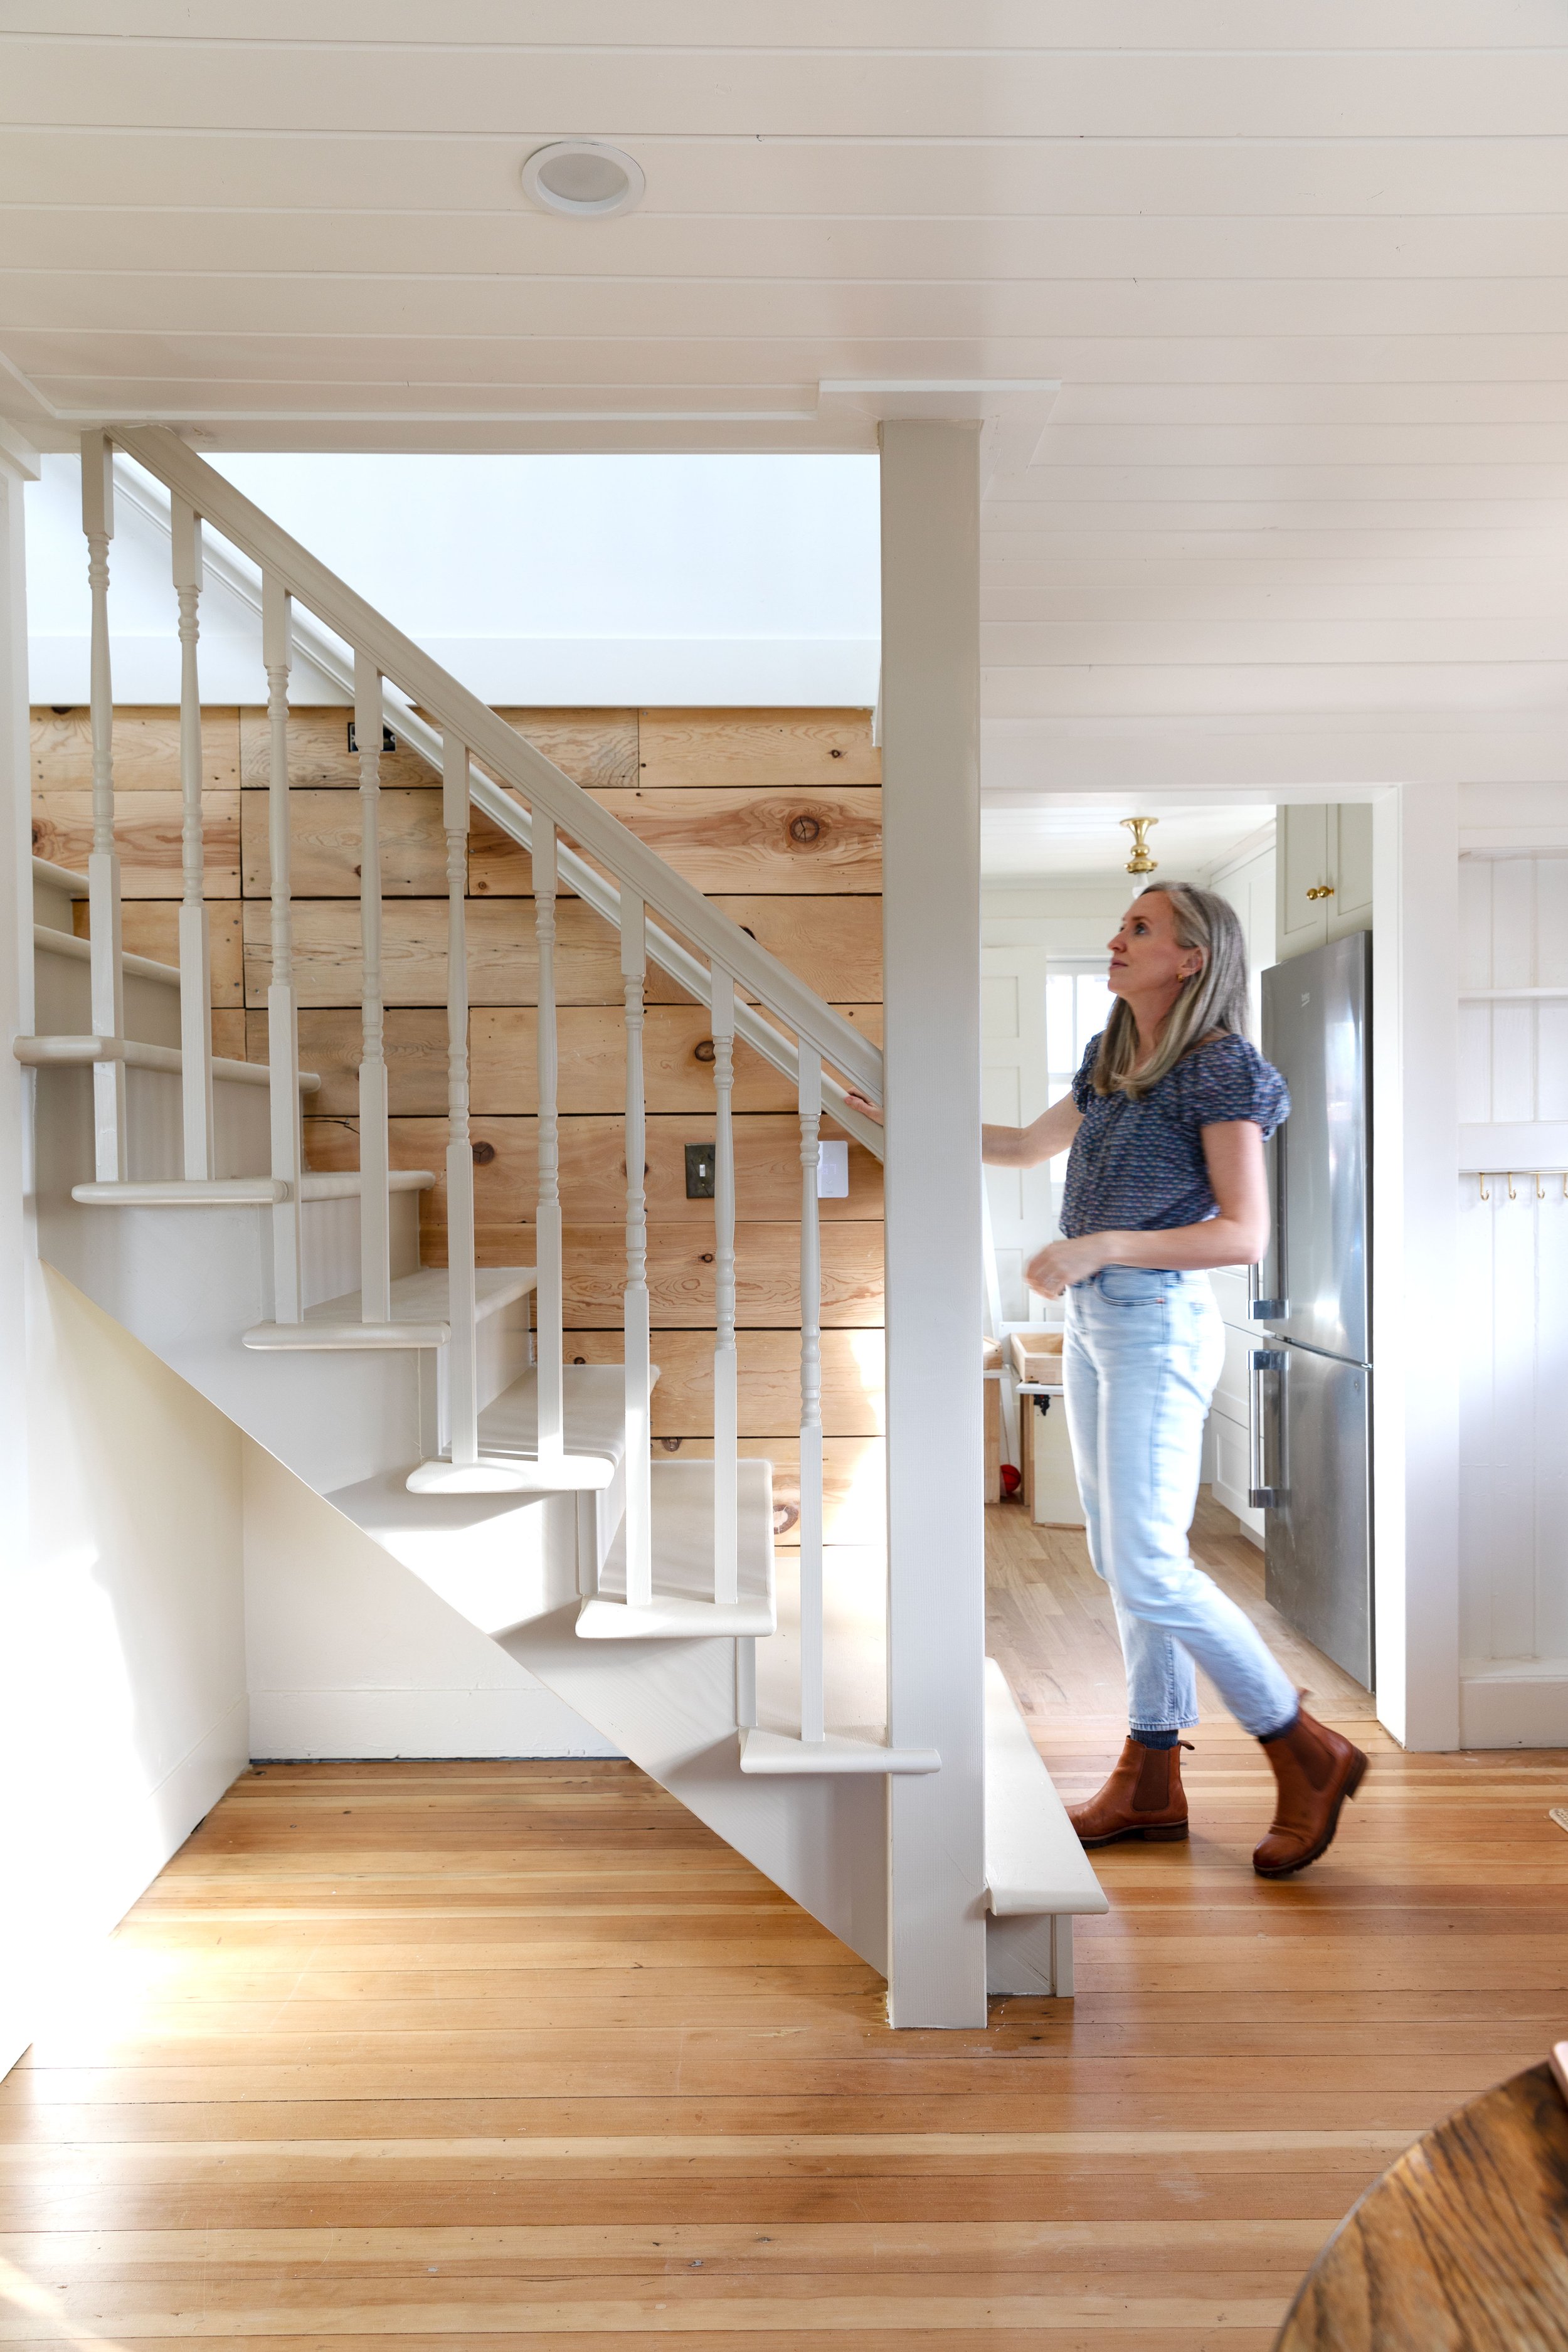
The staircase is officially done at the Poplar Cottage and today we’re spilling all the details! You may remember that this house was originally just one story, so this staircase (and the whole second story) is brand new. But it has an old-house, vintage-ey feel thanks to beautifully-detailed stair parts that we found at Home Depot. Read on for all the sources and details on this budget-friendly staircase…
Psst, catch up on posts about this project: the day we bought the house, lifting the house 8’ in the air, a new foundation, what the new foundation cost, reframing the second story, windows+doors, Poplar has a staircase!, second-story update, the evolution of the exterior, and all Poplar posts.
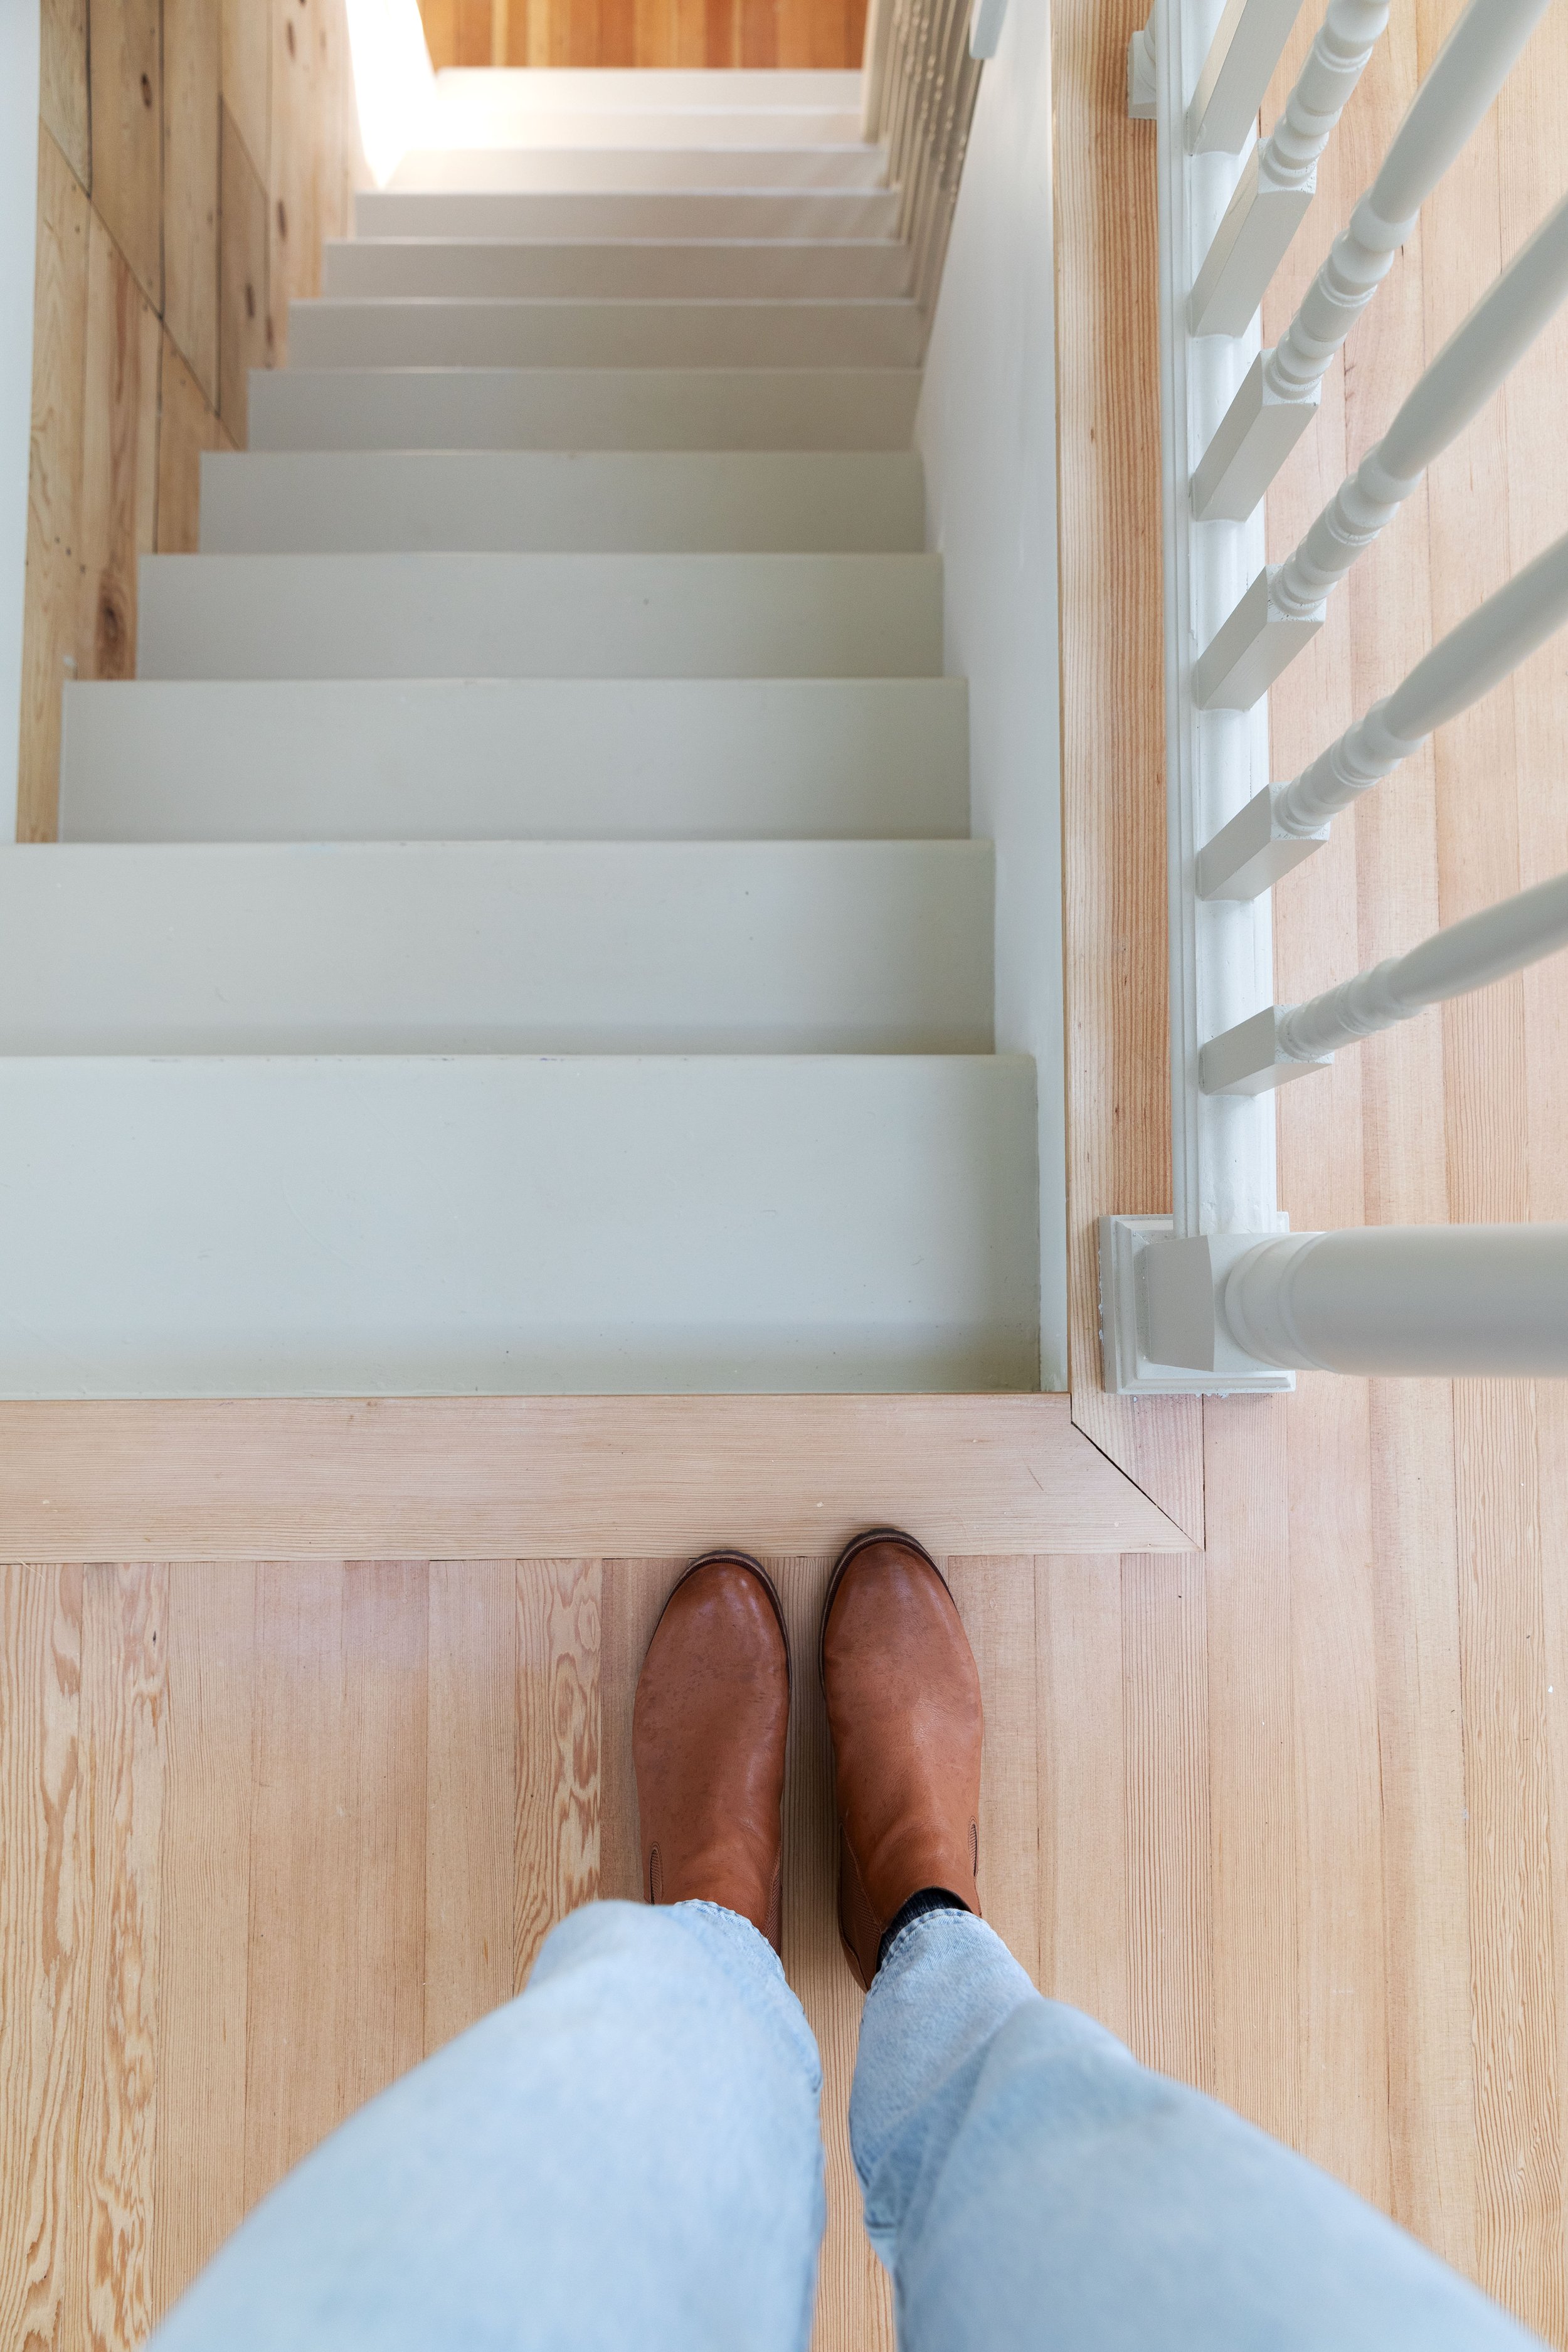
Back when we decided to add a second story to the Poplar Cottage, we struggled to fit a staircase in the cozy 550sf footprint. But in the end we squeezed one in, right smack dab in the middle of the house (more on that here). This staircase is on the steeper side with 11.25” treads and 7.75” risers, but it fits!
anatomy of a staircase
I mentioned the stair parts, but what exactly makes up a staircase? Here’s a diagram showing all the important bits.
Stair part sources
Can you believe that most of the materials for this staircase came off the shelf from Home Depot?! I was very pleasantly surprised by the turned balusters, classic handrail, solid treads, and pretty newel posts at the store (not sponsored, just a frequent customer ;). We opted for unfinished hemlock with the plan to paint everything once installed. Here are the parts we used:
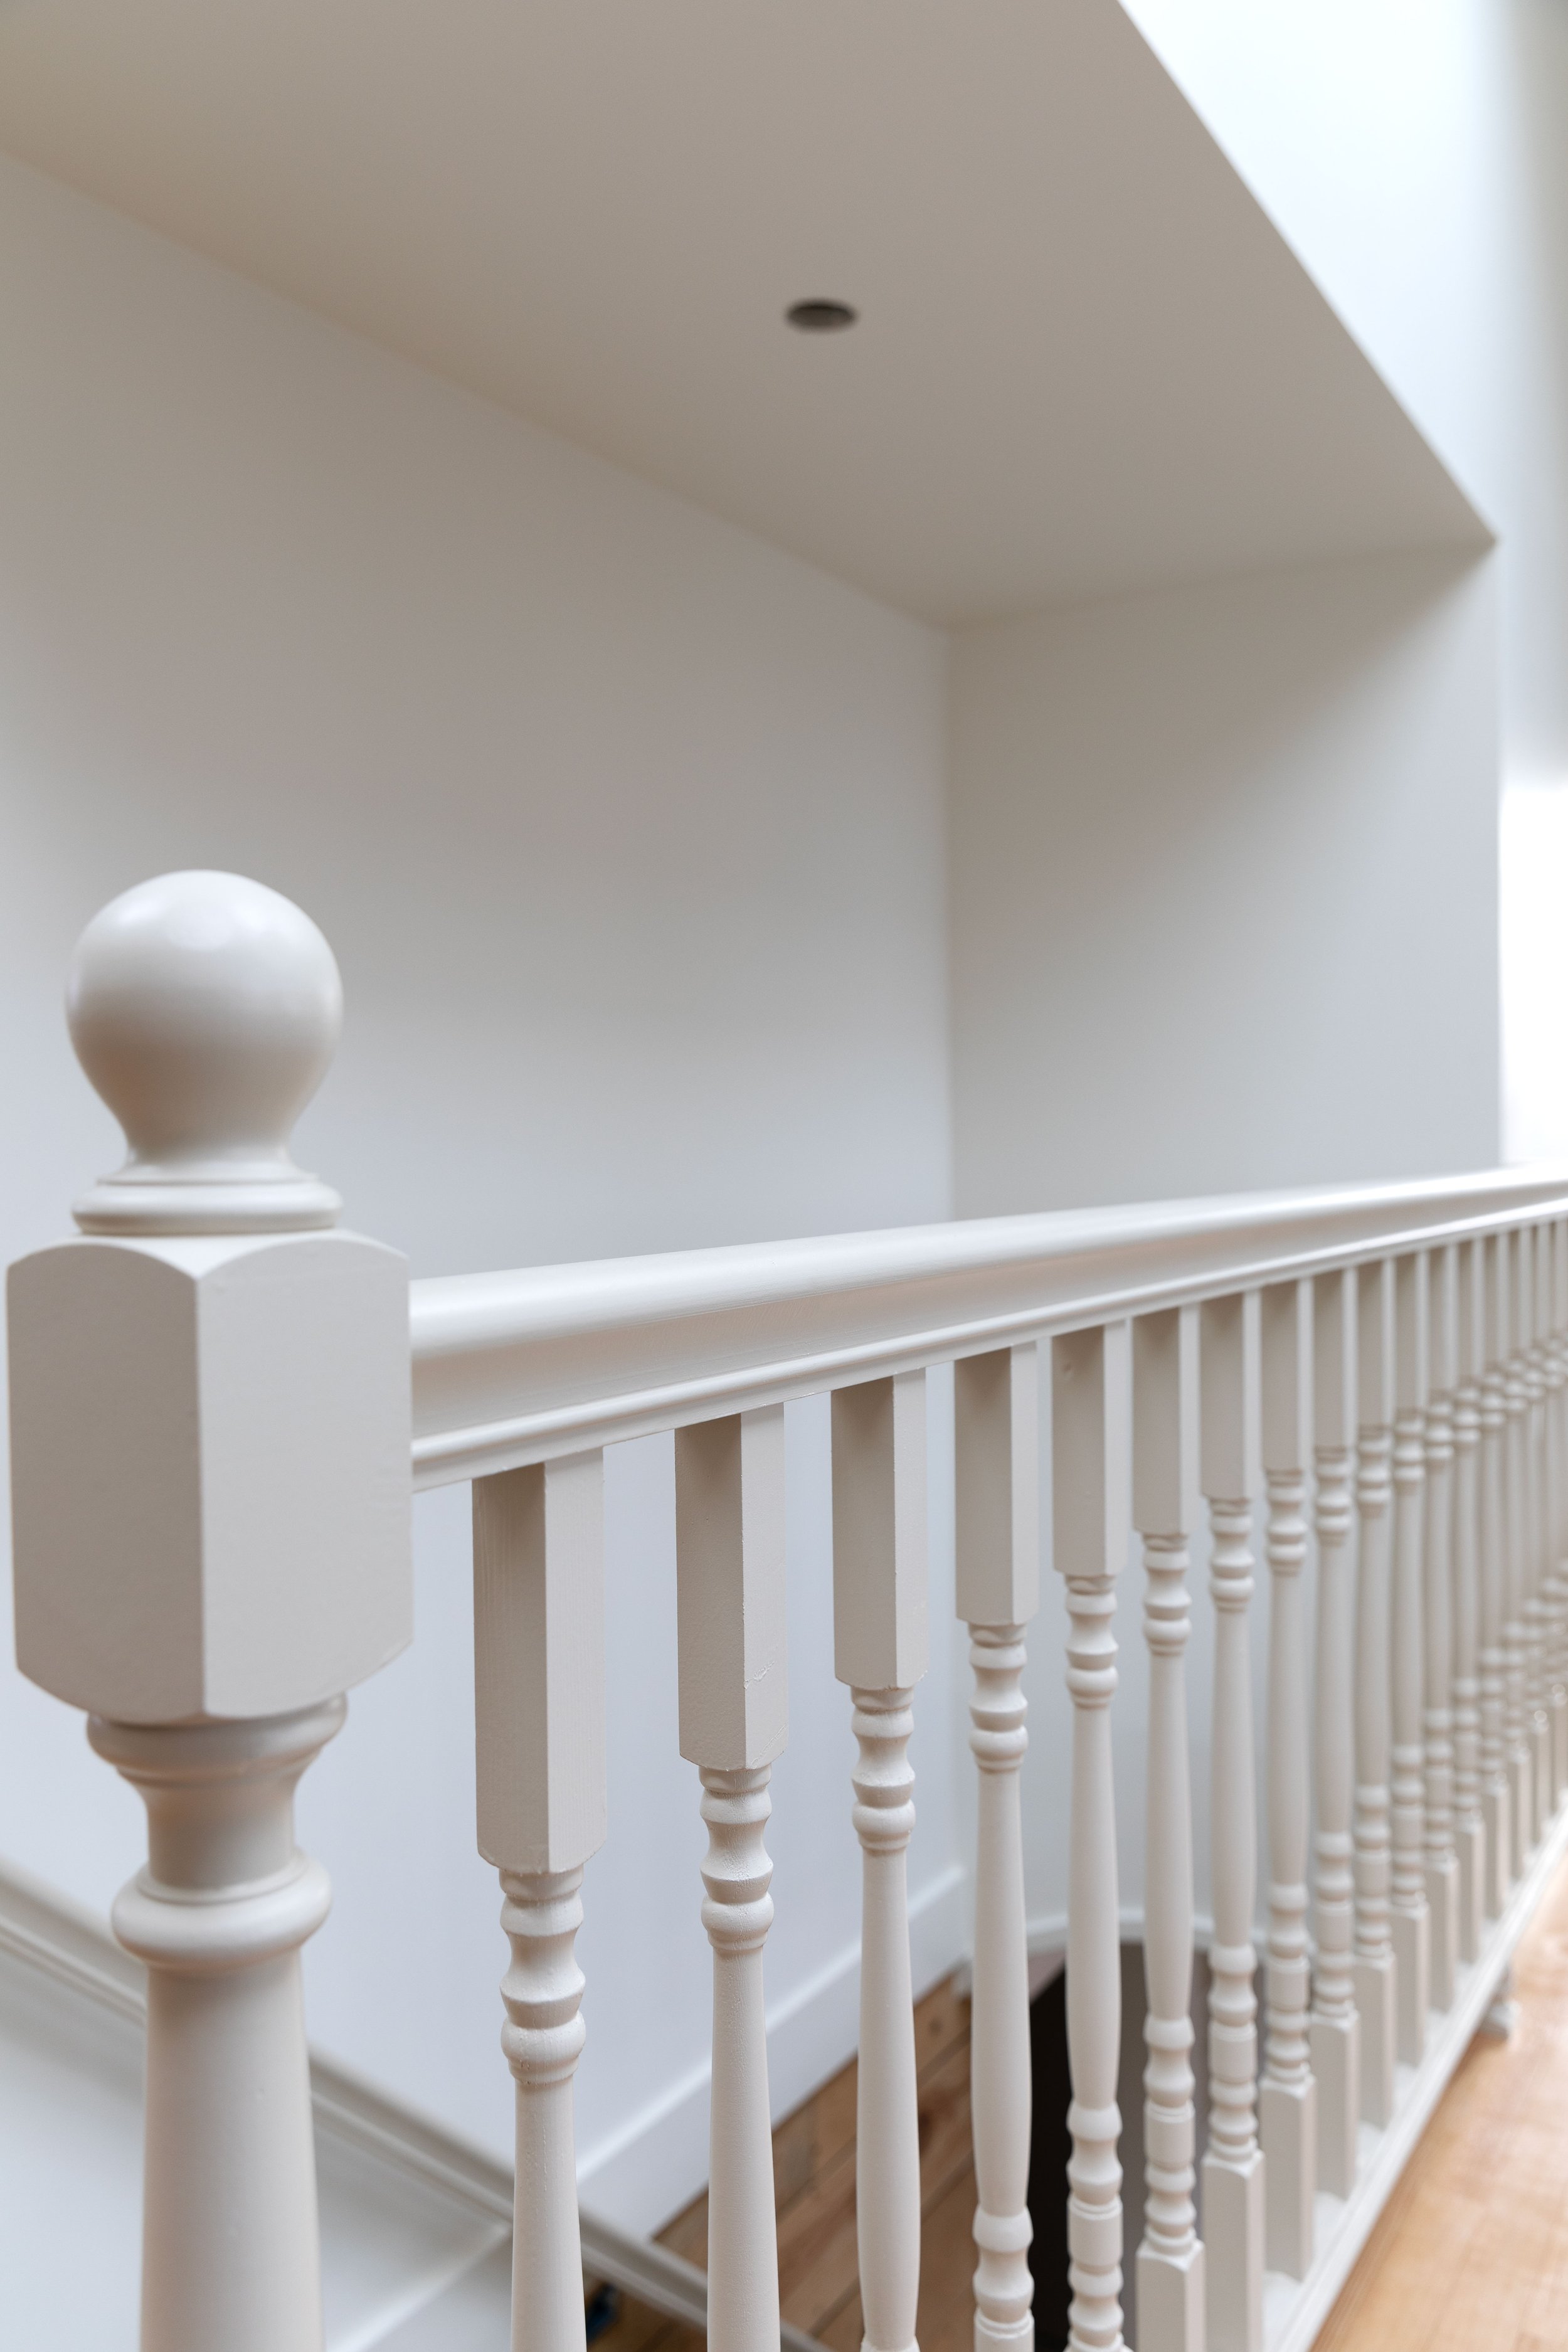
turned balusters - these detailed balusters come in 31 and 41 inch lengths and we opted for the longer, knowing we’d cut.
breadloaf handrail - I don’t know if breadloaf is technical term, but it describes the shape perfectly. It feels great in the hand!
ball top newel posts - the shape of these newel posts is lovely and they come with an attachment kit for the floor.
treads - we ended up buying stair treads locally and they were much more expensive, so if we could do it over, we’d get these from HD.
shoe rail - we opted to land the balusters on a shoe rail around the upstairs opening and filled in-between each baluster with crown fillet. That sounds fancy but it comes as a single part and is easy to use.
shoe rail support - to support the shoe rail (because we all know kids are going to stand on it), we added little furniture feet.
risers - we used standard, cabinet-grade plywood that can take a beating
color: Farrow & Ball Stony Ground, No.211
We originally planned to paint this staircase blue, but once the other rooms started to come together, a more neutral look felt warranted. I sampled a few beigey/taupey warm colors, and landed on Farrow and Ball Stony Ground, No.211 (color matched by Sherwin Williams).
paint products
Before painting these, we primed everything with a high-quality interior/exterior primer. Then we talked with the folks at Sherwin Williams to make sure we ended up with a durable paint product. We decided to use two different products, one for the railing and trim and one for the walking surfaces. Both were applied with a sprayer.
Handrails, balusters, newel posts, risers: Sherwin Williams Emerald Urethane Trim Enamel, satin
Treads: Sherwin Williams Porch and Floor Enamel, satin
Of course we’ll have to wait to see how it wears, but so far we’re really pleased with the paint. The products, especially applied with a sprayer, are so dang beautiful!
Stony Ground is a warm neutral color, but we noticed it can read a bit green at certain times of the day, especially on the floor. It looks beautiful against the warm fir floors and exposed original wall shiplap.
I’m just in love with that paint color and finish!
Before I leave you, here’s a little peek at the shenanigans we started in the kitchen (more soon!).
ps we may receive a small affiliate commission if you purchase something through our links, at no cost to you. Thank you for supporting the Grit and Polish!


