Building the Pantry Storage Wall
THE FARMHOUSE
Well here we are at the end of January and I’m just getting our first pantry update out. Opps. (You can catch up on the project kick-off here.) Honestly, we were hoping to have this entire project finished before February, but that’s obviously not going to happen. Even so, we’re really happy with how the built-in shelves turned out. And today I wanted to show you our progress and talk through some of the decisions we made including why we opted for open shelves instead of cabinetry.

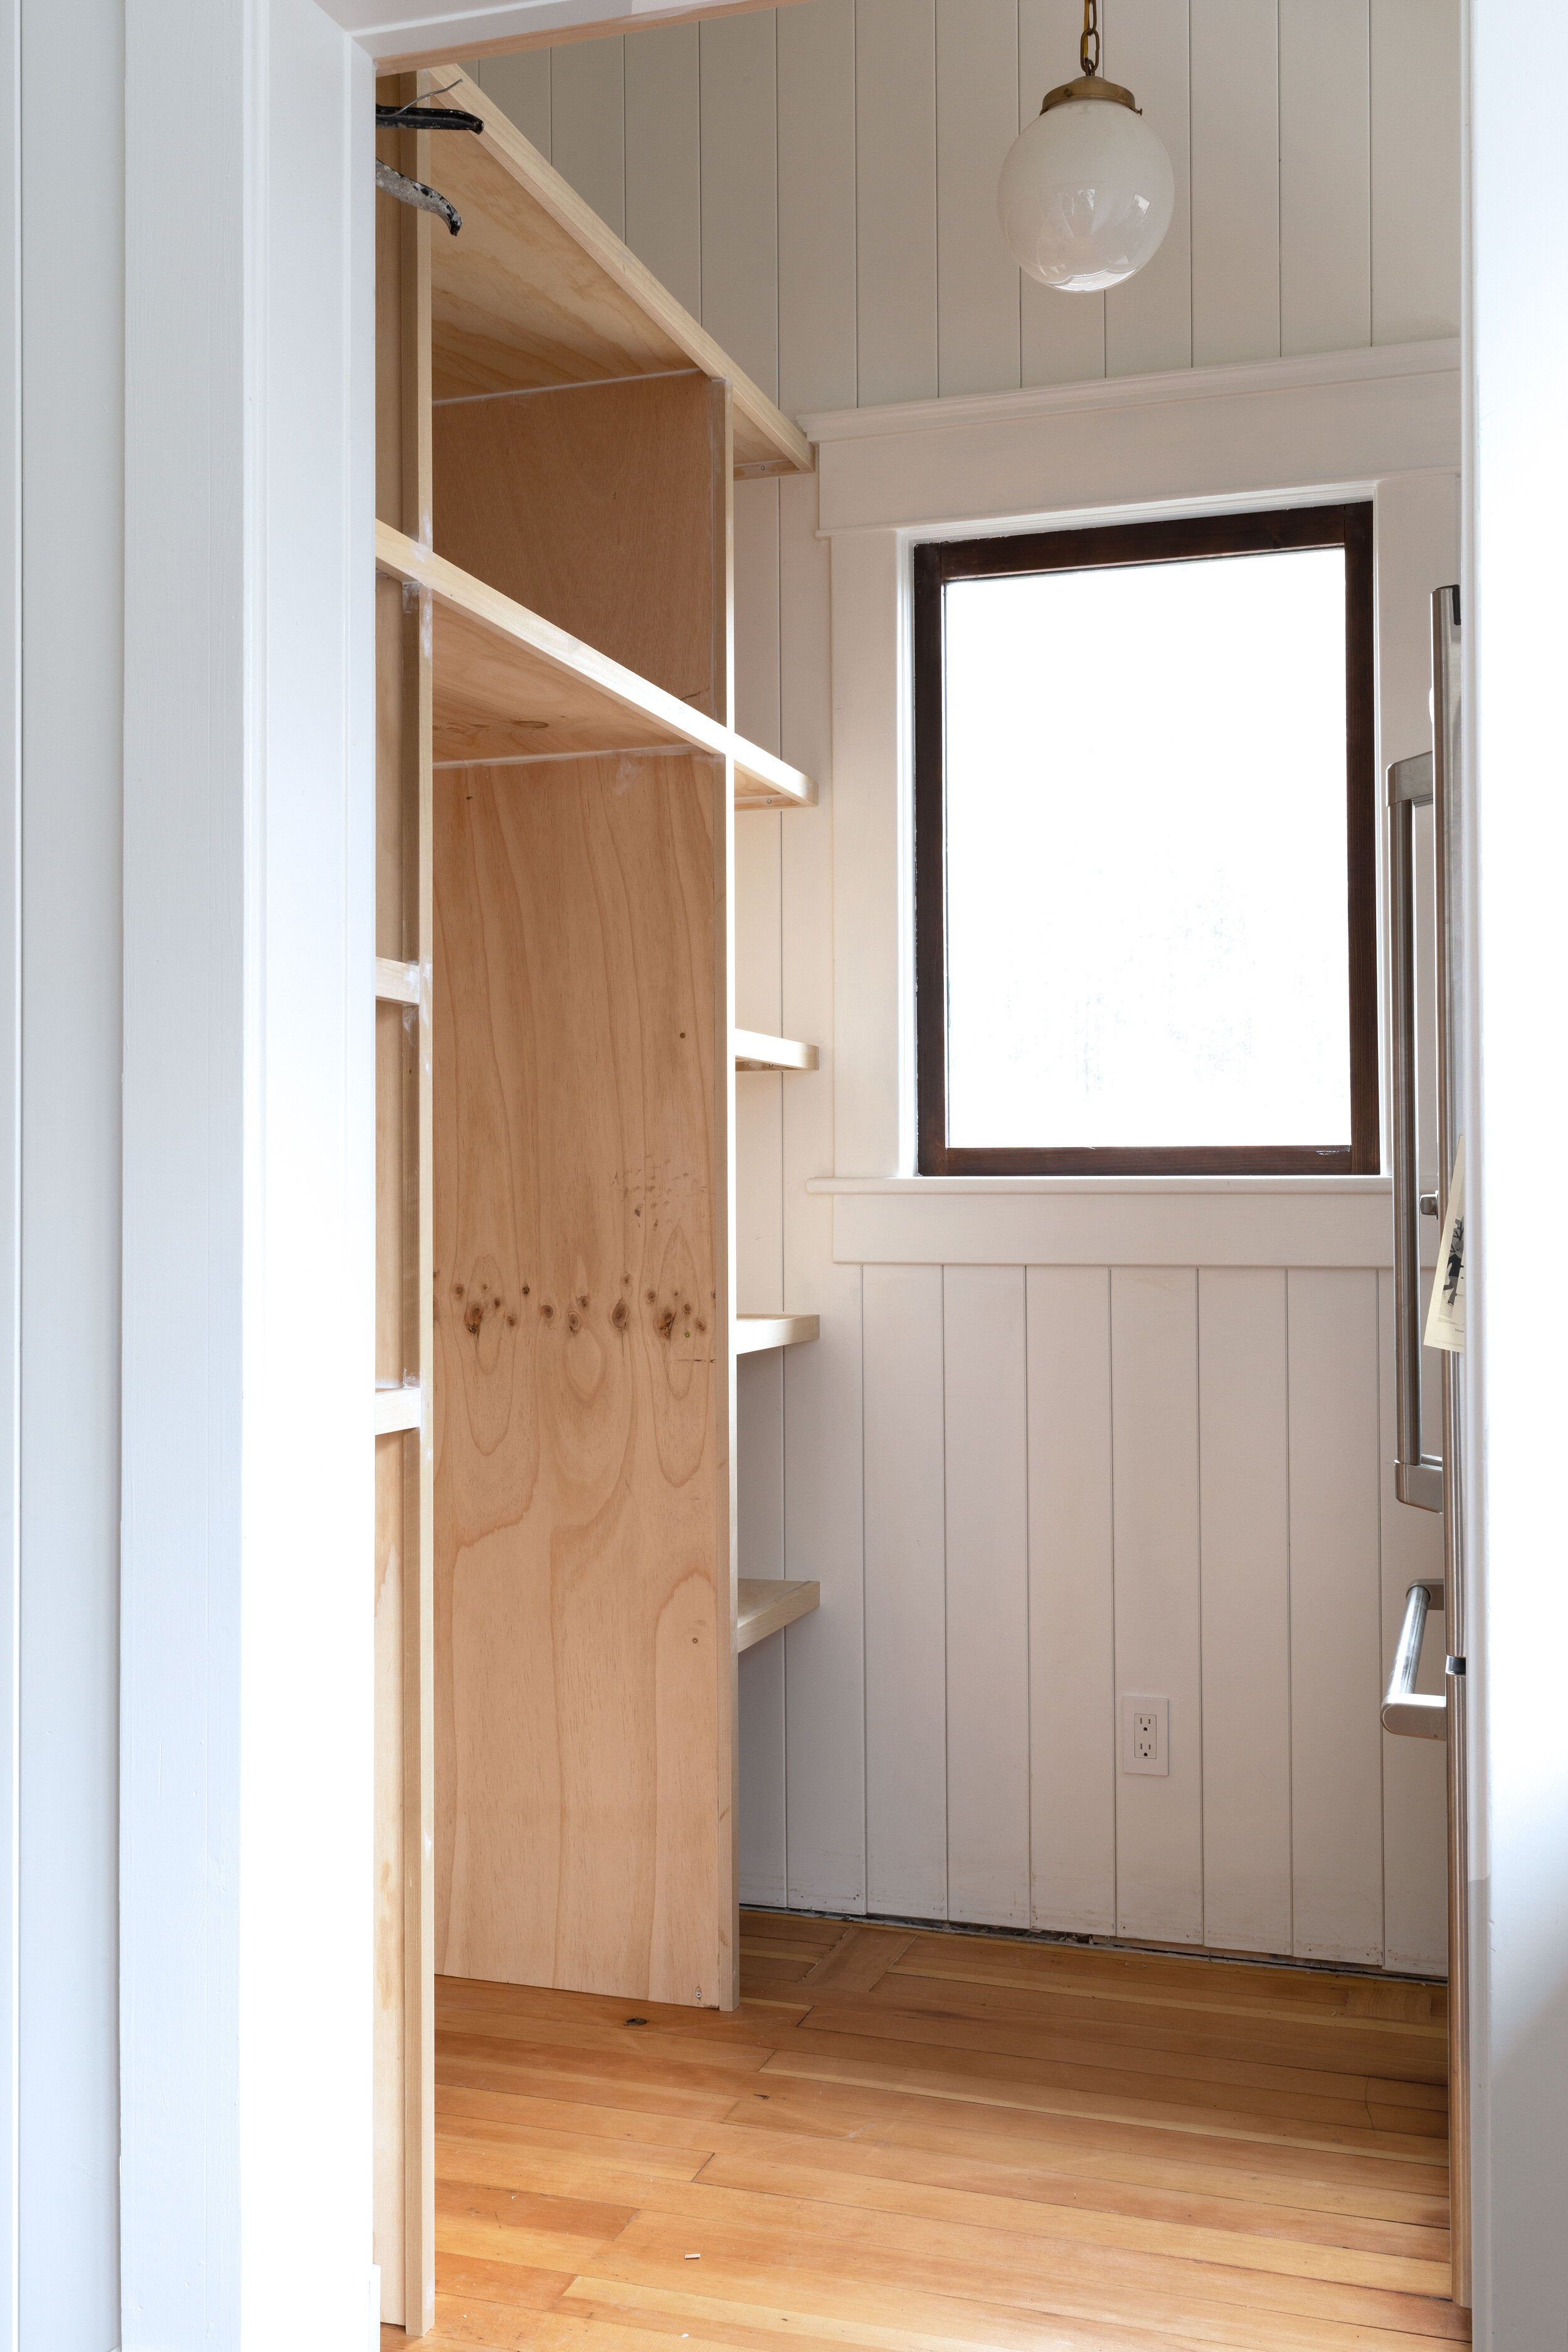
I took these photos yesterday mid-day, just before Garrett masked for paint. Everything is caulked and ready for primer in these photos. BTW, we decided to use the sprayer again to get a nice finish…more on that soon.

shelves vs. cabinetry
The south wall of the pantry is going to be used for food storage. We opted for built-in shelves made out of 3/4” plywood with a face frame to match the kitchen cabinetry’s. There are vertical pieces around the fridge nook so the whole thing should feel really built-in and custom. And in case you’re wondering why the fridge is in the wrong location, we just moved it out of the way temporarily while we work on the shelves. (If you’re new to this project…YES our primary fridge is going to live inside our pantry!)
location and visibility
The location of the shelves is such that you won’t see the food unless you’re inside the pantry, so we opted for open shelves rather than full-on cabinets with doors to save money. Inset cabinet doors would have also taken more work and likely would have made this relatively small space feel more awkward. The room is 6’ x 8’10” for reference. Here’s a look at where the built-in shelves sit relative to the kitchen.

I’ve been asked a lot on Instagram if the shelves will pull out and the answer is no. We would have really liked to make them pull out, but with the window and door molding it was just too difficult. The shelves are deep, but I think we can still use them efficiently.


dimensions
The shelves are 18” wide on either side of the fridge and 24” deep. The whole unit is 6’-wide and the ceilings in here are 10’-tall. These shelves should provide plenty of storage for our food and garbage/recycling, and leave room for the kitchen items we don’t use often near the ceiling (like my canning stuff). It can be hard to get scale on these photos so I thew myself into a photo (I’m 5’7” or so for reference).

considerations
Garrett put together a DIY on these shelves after they were done (available here), but I thought it would be helpful to share a few things we considered when building these shelves in the meantime:
Add a face frame for a higher-end look and match the dimensions to the kitchen’s cabinetry
Think through how you’ll use the storage and make sure there’s room for taller things like a garbage can if need-be.
Electrical! We like to throw in an outlet in at least one shelf in case you need a toaster or another countertop appliance
Food isn’t always the prettiest of storage, so if this location was more visible we likely would have opted for cabinet doors
Size the fridge opening for a standard appliance dimension (in case you have to replace the fridge later)
That’s all I have for you today. Hoping we’ll have these painted by the end of the weekend!